14 Brilliant Pallet Mud Kitchen DIY Ideas
Ignite imaginative play and embrace sustainable crafting with a fantastic pallet mud kitchen diy project that promises hours of outdoor fun. Repurposing wooden pallets offers an eco-friendly and budget-conscious way to create a durable and engaging outdoor kitchen for children, encouraging creativity and connection with nature. Forget expensive plastic alternatives; building your own upcycled mud kitchen provides a rewarding experience for both parent and child, customizing every detail to suit your space and aesthetic. This guide will walk you through 14 brilliant ideas to construct a charming and functional play area, transforming simple materials into a world of culinary make-believe right in your backyard.
- Choose Safe, Sturdy Pallets
- Design a Basic Frame
- Install a Functional Countertop
- Incorporate Delightful Sink Options
- Add Faucets and Knobs
- Craft Under-Counter Storage
- Build a Creative Backsplash
- Attach Utensil Hooks and Rails
- Design an Oven and Hob
- Personalize with Paint and Decor
- Integrate a Built-in Planter Box
- Ensure Weatherproofing and Durability
- Add Final Touches and Integrate Play Area
Choose Safe, Sturdy Pallets
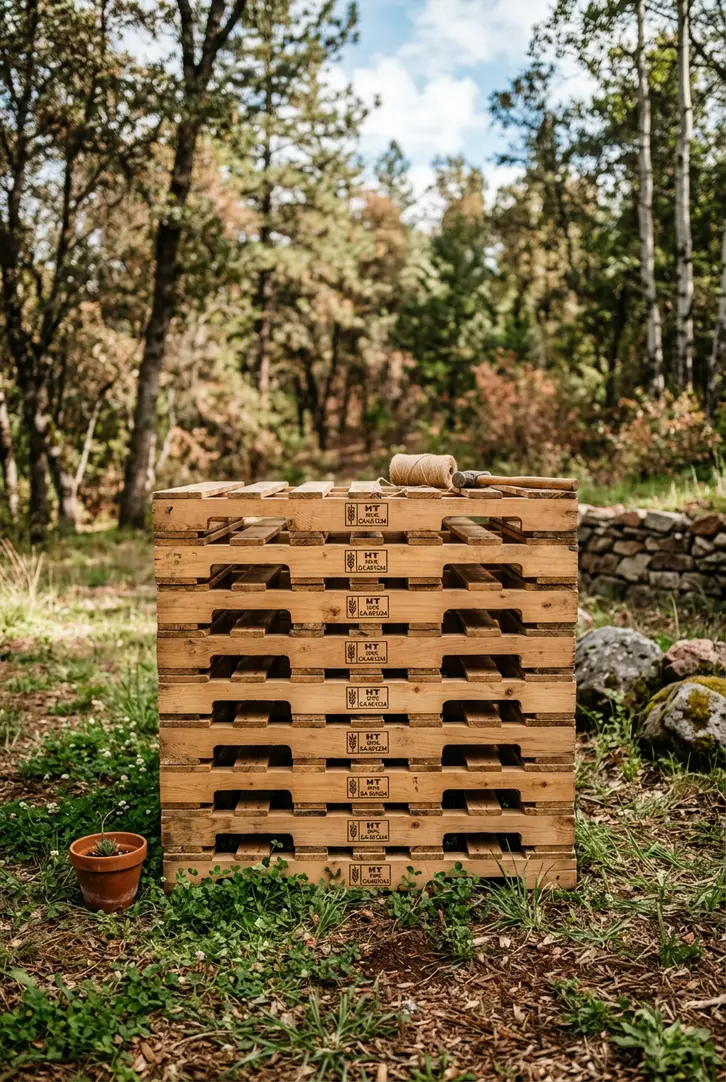
Begin your project by selecting pallets marked with an ‘HT’ stamp, indicating they were heat-treated rather than chemically treated, ensuring safety for children’s play. Prioritize pallets free from severe damage, mold, or persistent stains, aiming for sturdy planks that will withstand outdoor elements and enthusiastic play. Dismantle your chosen pallets carefully using a pry bar and hammer, saving all planks and blocks, then thoroughly sand every surface to remove splinters and rough edges, creating a smooth and safe finish for little hands.
Design a Basic Frame
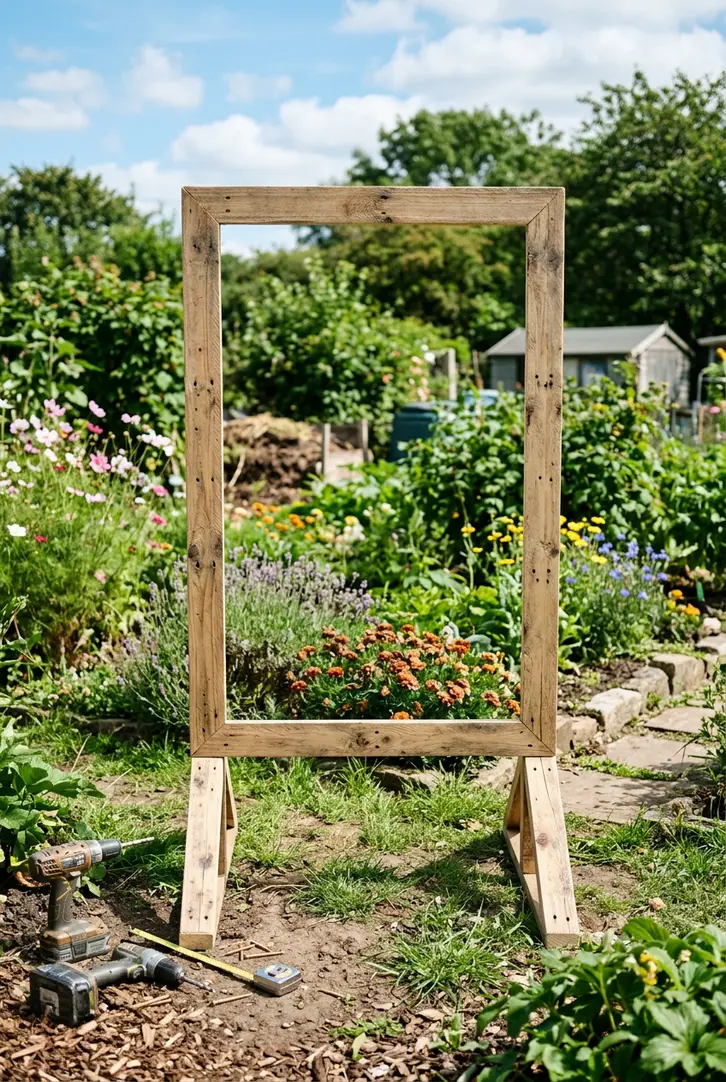
Construct the core structure of your mud kitchen by assembling a basic rectangular frame from the sturdy pallet wood, determining the ideal height and width for your child’s reach and the available space. Use treated timber or thicker pallet pieces for the legs, securing them firmly with exterior-grade screws to ensure stability and longevity in outdoor conditions. Add crossbeams and horizontal supports to create the countertop base and shelves, making sure all connections are robust enough to withstand rigorous play and potential heavy loads of mud creations.
Install a Functional Countertop
Create a durable and easy-to-clean countertop using a solid piece of salvaged timber, an old cutting board, or even a section of exterior-grade plywood, ensuring it extends slightly over the frame for a finished look. Secure the chosen material firmly to the top crossbeams of your pallet mud kitchen with screws, countersinking them for a smooth surface. For an even more robust surface, consider tiling a small section using leftover outdoor tiles, providing a permanent, weather-resistant workspace perfect for mashing leaves and mixing ‘potions’.
Incorporate Delightful Sink Options
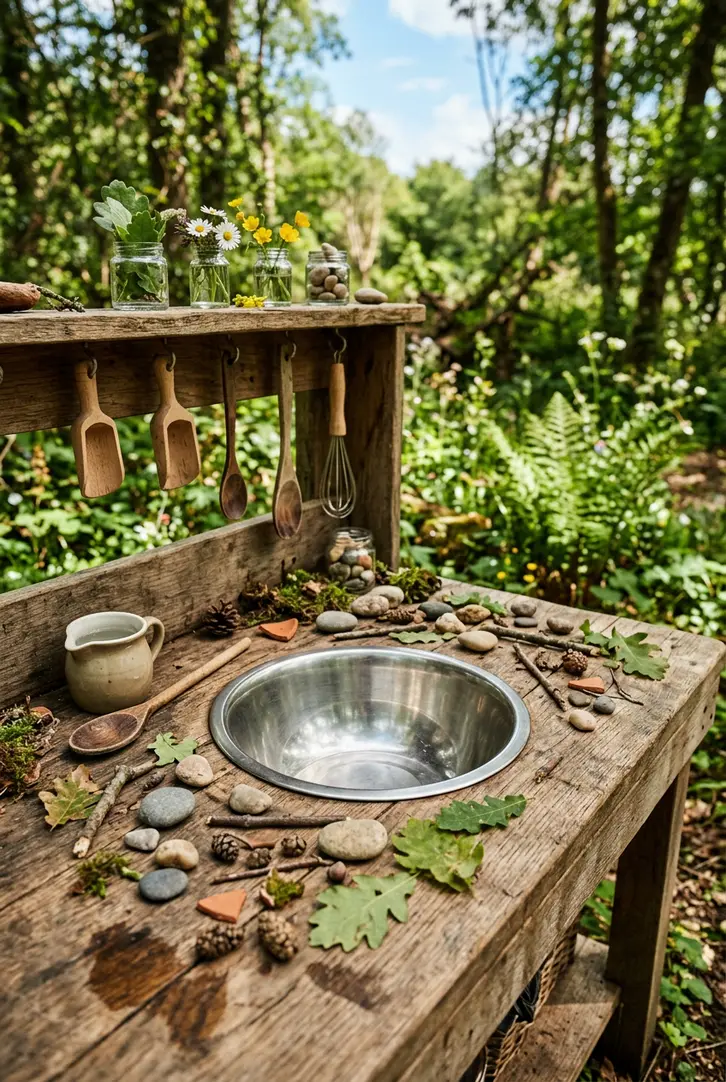
Integrate a charming ‘sink’ into your mud kitchen by cutting a circular or rectangular opening in the countertop to perfectly fit an old stainless steel mixing bowl, a plastic tub, or even a sturdy enamel basin. Ensure the opening is precise for a snug, secure fit, allowing the basin’s rim to rest flush with the countertop surface. This easily removable sink facilitates easy cleaning and allows for versatile play, transforming from a water basin to a mud pie mixing station in moments, encouraging messy, sensory exploration.
Add Faucets and Knobs
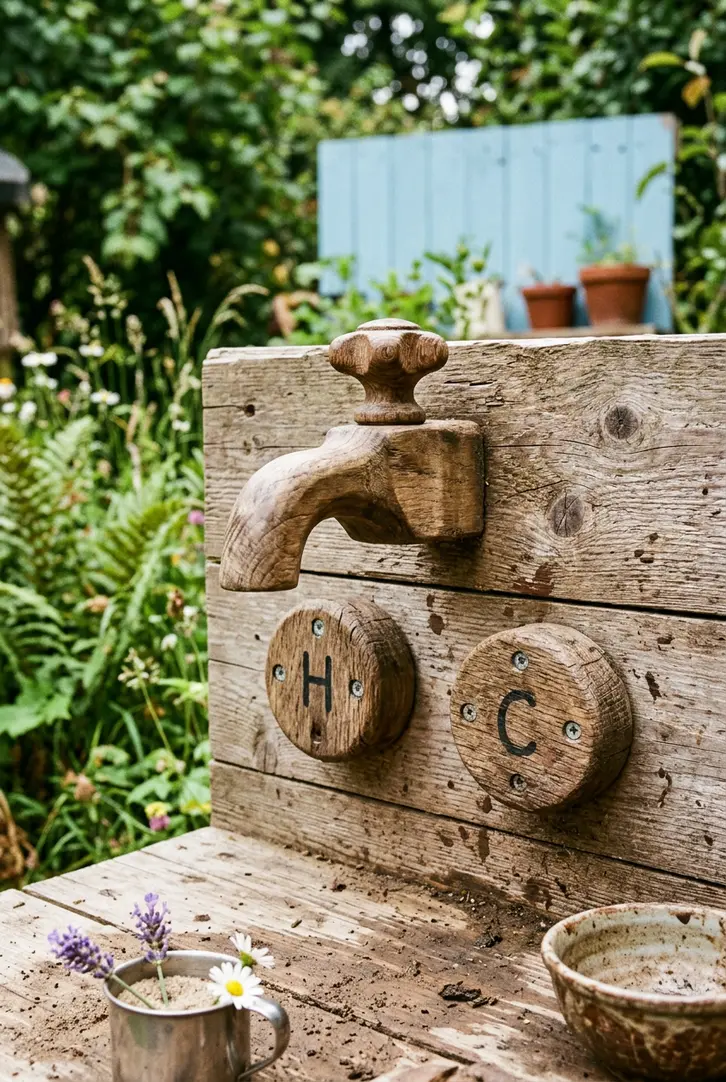
Enhance the realistic play experience by adding decorative, non-functional faucets and knobs to your mud kitchen, using repurposed wooden dowels, old door handles, or even painted plastic bottle caps. Attach a wooden ‘faucet’ near the sink area, perhaps crafted from a small pallet block and a dowel, creating the illusion of running water. Fasten a few round wooden knobs to the backsplash or countertop, allowing children to ‘turn on’ and ‘turn off’ imaginary burners or water, boosting their imaginative role-play scenarios.
Craft Under-Counter Storage
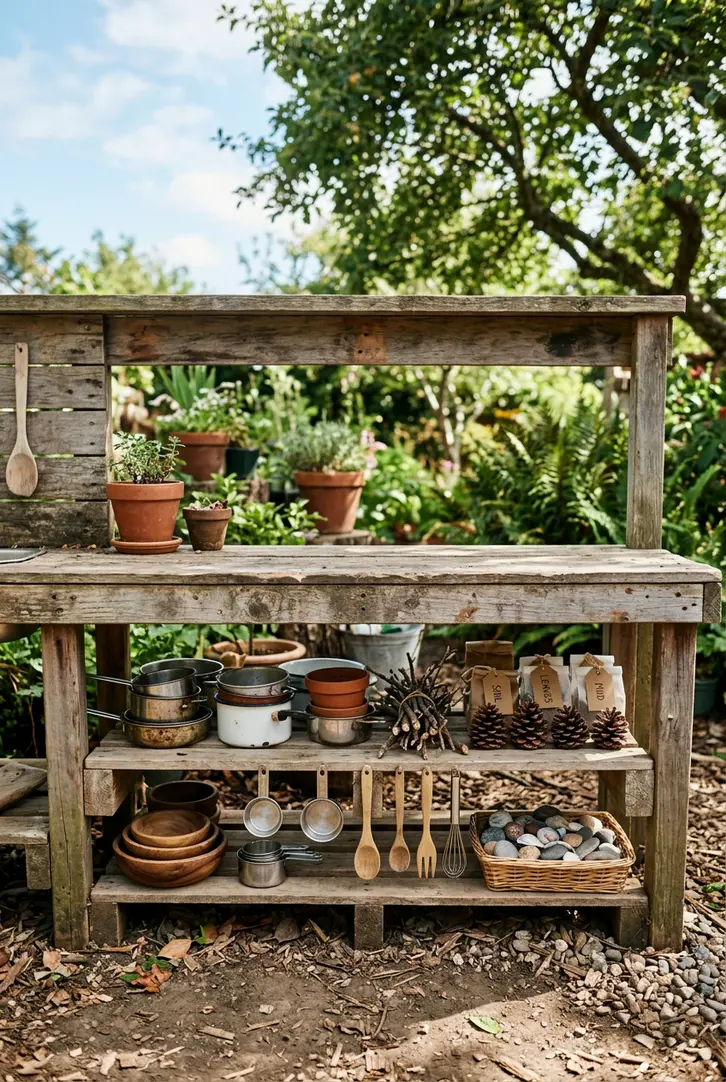
Maximize functionality by adding sturdy under-counter shelving for convenient storage of essential mud kitchen utensils, pots, and natural treasures. Cut additional pallet planks to size and secure them horizontally between the mud kitchen’s legs, creating one or two open shelves that are easily accessible for little hands. This organized space encourages children to tidy up after play and keeps all their ‘ingredients’ and tools within reach, fostering a sense of responsibility and order within their creative play environment.
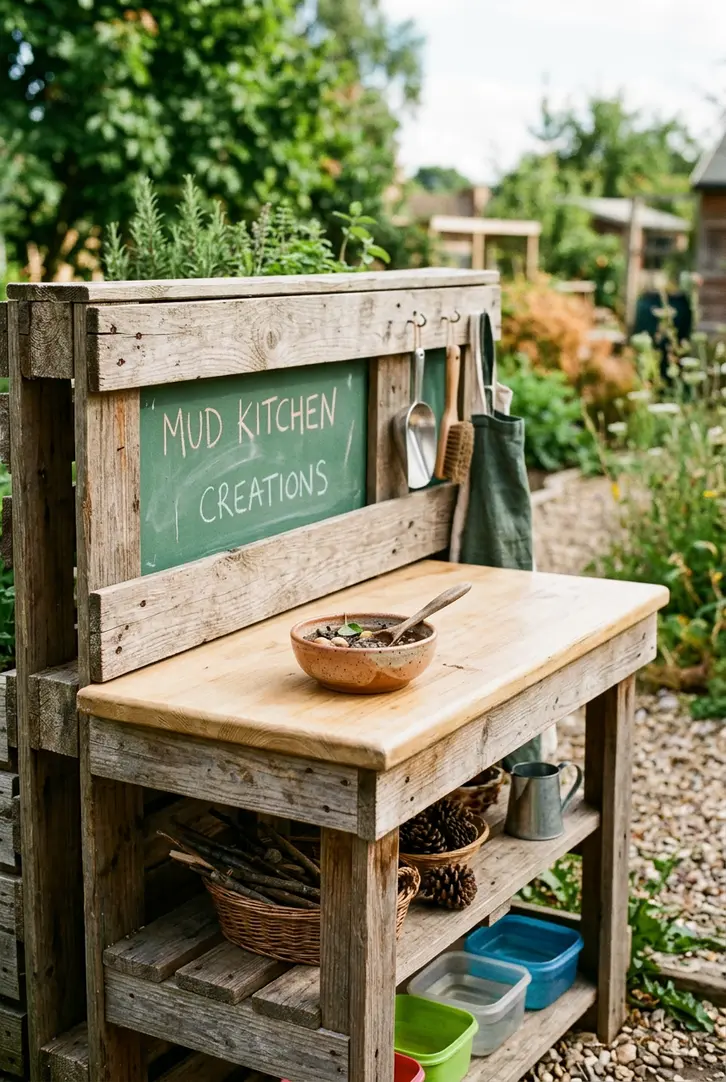
Build a Creative Backsplash

Elevate the visual appeal and practicality of your mud kitchen by adding a creative backsplash using leftover pallet planks, a piece of exterior-grade plywood, or even a sheet of corrugated metal. Paint the backsplash a cheerful color or apply a weather-resistant chalkboard paint, offering a writable surface for daily ‘menus’ or artistic expressions. This not only protects any wall behind it from mud splashes but also provides an excellent spot to attach hooks for hanging utensils, making the mud kitchen feel more authentic and complete.
Attach Utensil Hooks and Rails
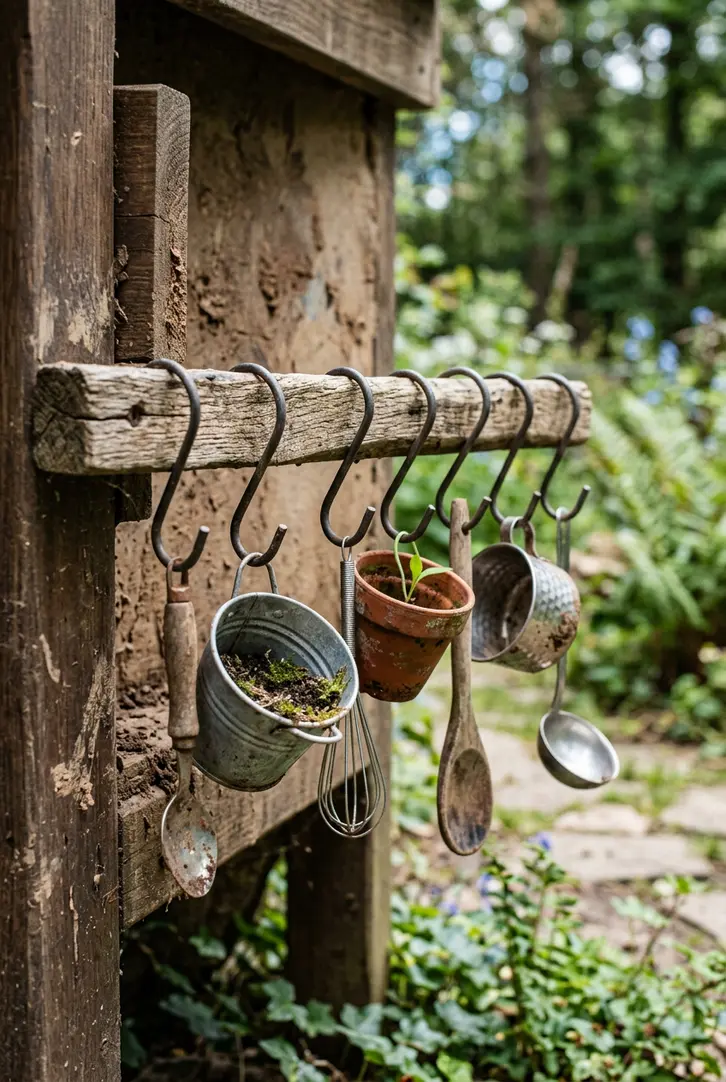
Install a practical rail and various hooks along the backsplash or side panels of your mud kitchen, providing designated spots for hanging miniature pots, pans, and cooking utensils. A simple wooden dowel secured with small brackets makes an excellent rail, while S-hooks or screw-in hooks offer versatile hanging solutions. This organized approach keeps tools readily available during imaginative cooking sessions and encourages children to manage their play space, making cleanup more engaging and promoting independent play.
Design an Oven and Hob Details for Your Pallet Mud Kitchen DIY
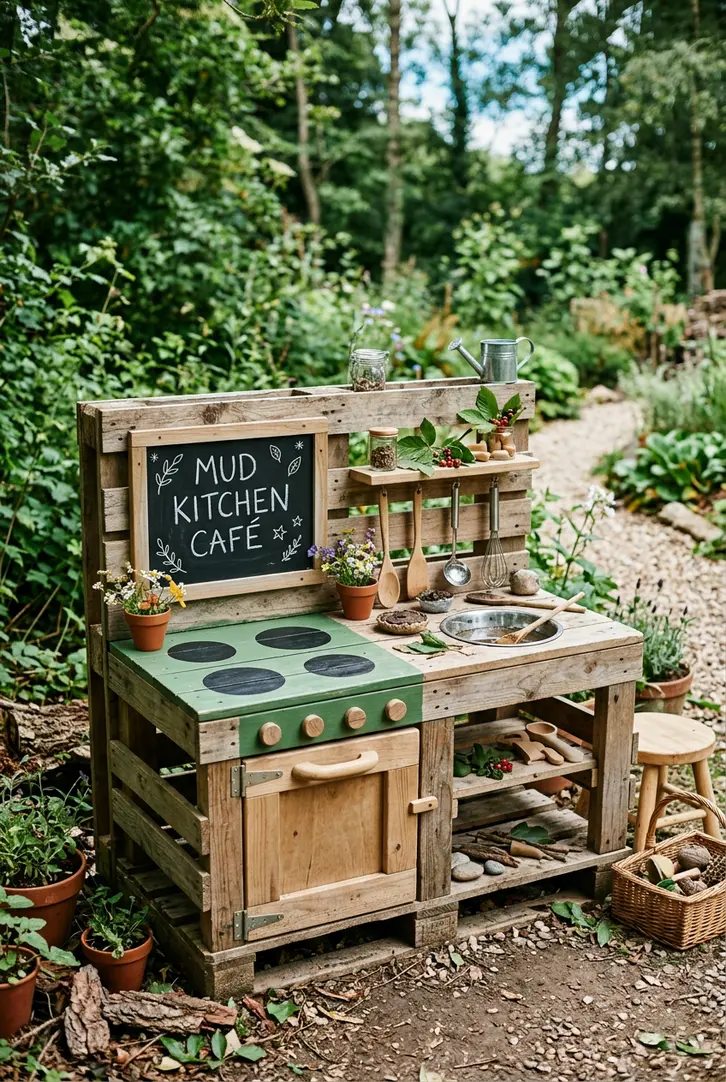
Integrate an engaging ‘oven’ and ‘hob’ into your pallet mud kitchen diy design by painting distinct circular ‘burners’ directly onto the countertop using weather-resistant black paint. For the oven, attach a hinged piece of pallet wood or plywood to the front frame, creating a simple drop-down door, complete with a small wooden handle. This clever pallet mud kitchen diy detail encourages role-playing scenarios like baking mud pies or cooking imaginary meals, adding another layer of interactive fun and realism to their outdoor culinary adventures.
Personalize with Paint and Decor
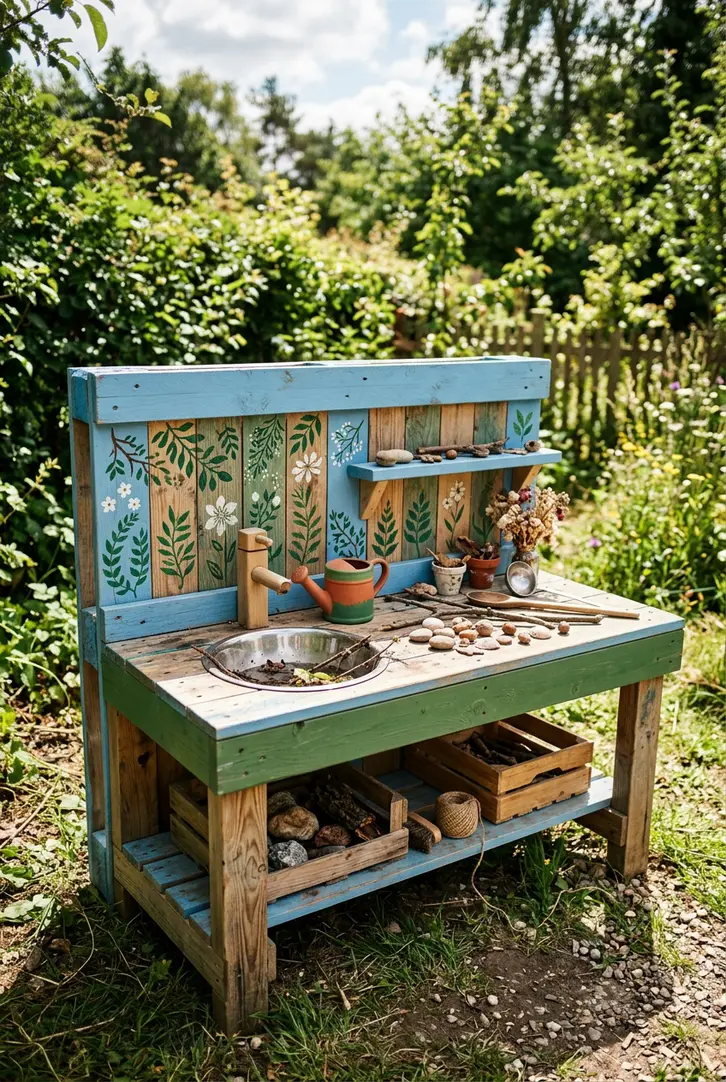
Infuse personality into your mud kitchen by painting it with vibrant, weather-resistant outdoor paints in colors that complement your garden or your child’s preferences. Consider stenciling playful designs like leaves, flowers, or even ‘kitchen rules’ onto the backsplash or side panels for an extra touch of charm. Encourage children to participate in decorating with non-toxic paints or by collecting natural elements like smooth pebbles, shells, or pinecones to glue onto frames, making it truly their own unique play space.
Integrate a Built-in Planter Box
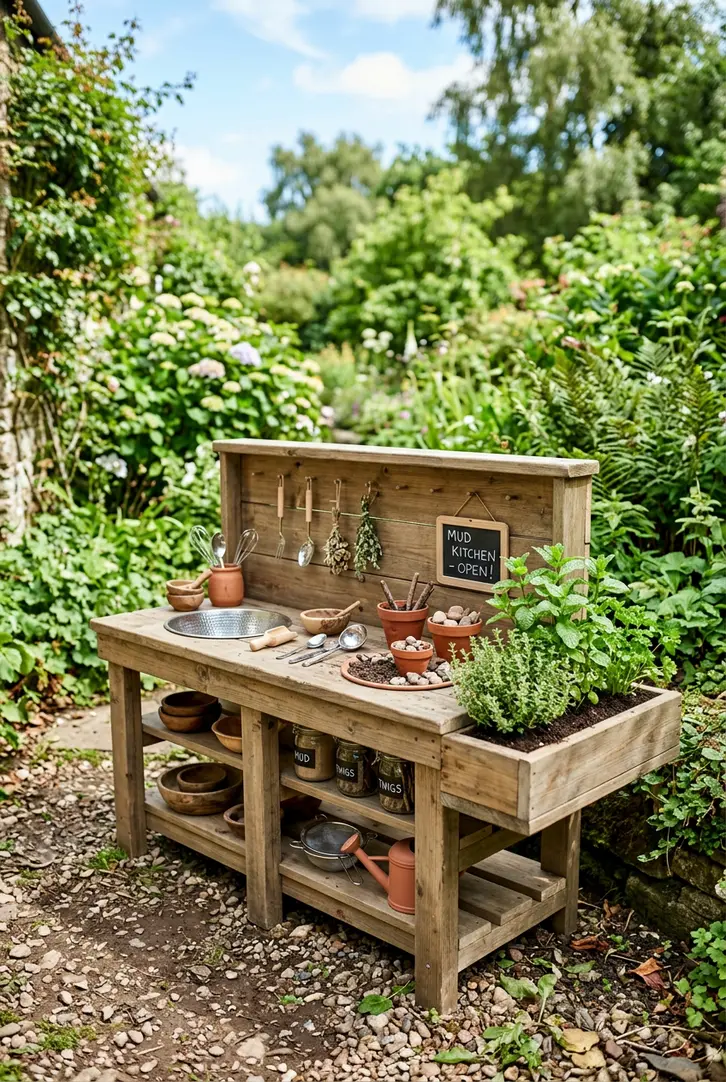
Add a delightful living element to your mud kitchen by incorporating a small built-in planter box at one end, fashioned from leftover pallet wood and lined with landscape fabric. Plant child-safe herbs like mint, thyme, or lavender, which can be ‘harvested’ for imaginative cooking, adding sensory engagement through scent and texture. This feature connects play with nature, teaches children about growing plants, and provides a continuous source of fresh ‘ingredients’ for their mud-based culinary creations, enriching the overall play experience.
Ensure Weatherproofing and Durability
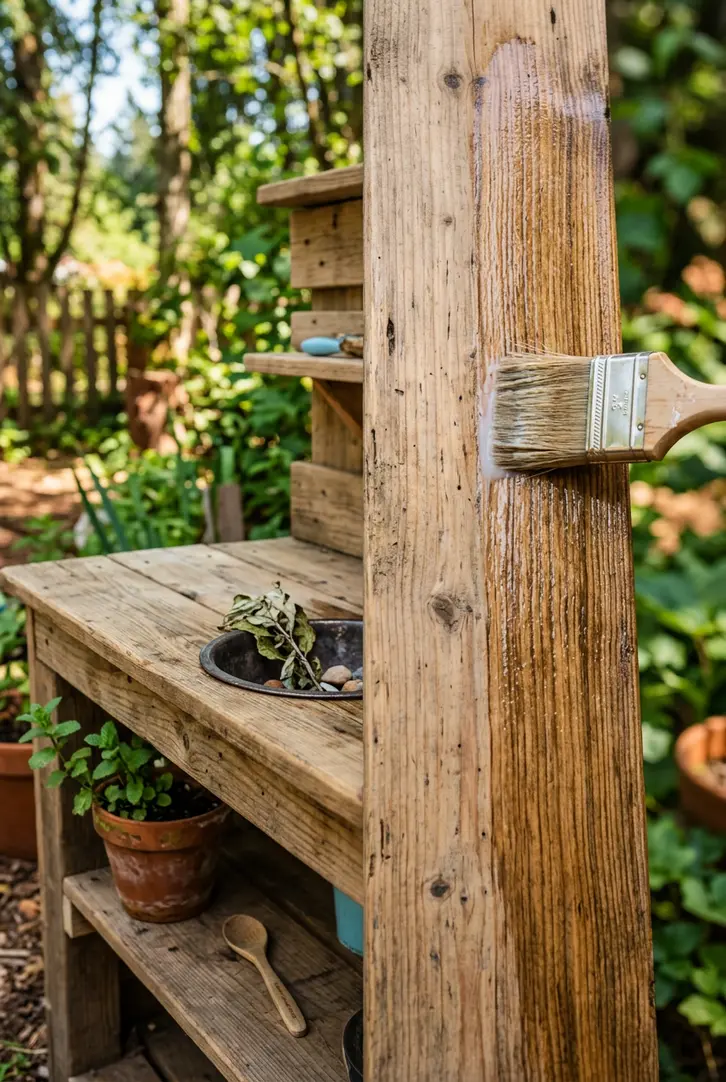
Protecting your pallet mud kitchen diy from the elements is crucial for its longevity, so apply at least two coats of a child-safe, exterior-grade wood sealant or paint that offers UV protection and water resistance. Pay particular attention to all cut edges and areas prone to water exposure, ensuring thorough coverage to prevent rot and splintering over time. Regular maintenance, such as reapplying sealant annually and storing the kitchen under cover during harsh weather, will significantly extend the life of your upcycled outdoor play kitchen, keeping it ready for endless adventures.
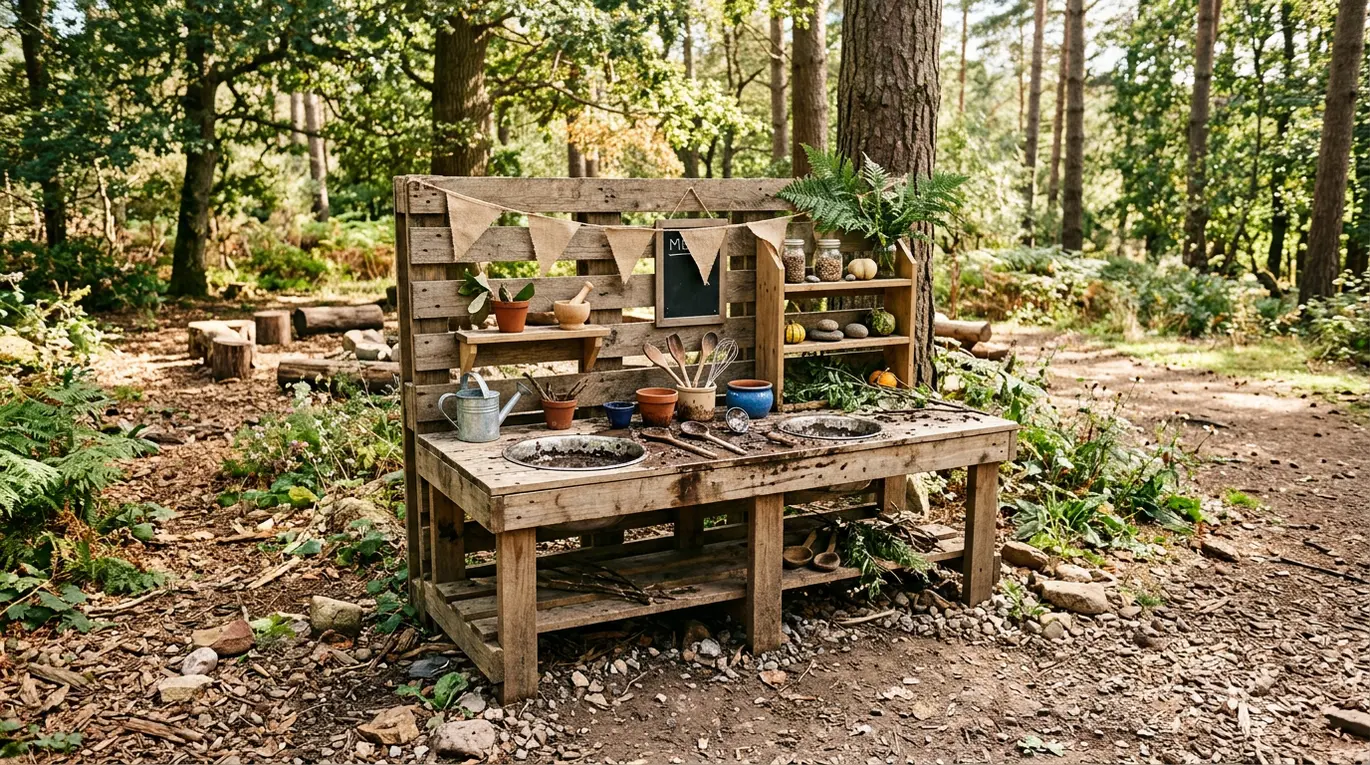
Add Final Touches and Integrate Play Area

Complete your pallet mud kitchen diy setup by arranging an inviting play area around it, perhaps adding small logs or stumps for seating, a designated ‘mud pit’ nearby, and a bucket of water for easy access. Stock the shelves with actual kitchen tools that are safe for children, such as old metal spoons, plastic cups, and small colanders. Integrate natural elements like pinecones, leaves, and small stones as ‘ingredients’ for their imaginative cooking, making the entire space a cohesive and stimulating environment for open-ended outdoor play and creativity.
Inspiration Gallery Recap
Swipe through all the ideas below to find your perfect match.