17 Brilliant DIY Mud Kitchen Ideas for Endless Outdoor Fun
Ignite your child’s imagination and foster a love for the outdoors by building a fantastic diy mud kitchen. These creative spaces are more than just play areas; they’re hubs for sensory exploration, fine motor skill development, and open-ended learning, encouraging children to experiment with natural materials and engage in pretend play. Whether you’re a seasoned crafter or just starting your DIY journey, we’ve curated 17 brilliant, actionable ideas to help you construct a custom outdoor play kitchen. Get ready to transform your backyard into an adventurous culinary world where mud pies are gourmet and nature is the pantry, providing endless hours of joyful discovery and hands-on engagement.
- The Upcycled Pallet DIY Mud Kitchen Base
- Functional Repurposed Sink Installation
- Creative Log Slice Stove Burners
- DIY Chalkboard Backsplash for Recipes
- Building Practical Tiered Storage Shelving
- Designing a Rustic Mud Oven Area
- Adding Mobility with Caster Wheels
- Quick Build Using an Old Cabinet Frame
- Crafting Natural Branch Utensil Hooks
- Infusing Vibrant Color with Paint
- Integrating a Child-Friendly Water Pump
- Planting a Miniature Herb Garden
- Defining the Play Zone with Stone Borders
- Creating a Potion Station with Bottles
- Compact Corner Design for Small Spaces
- Building a Robust Tire Stack Station
- Adding a Canopy for Shade and Shelter
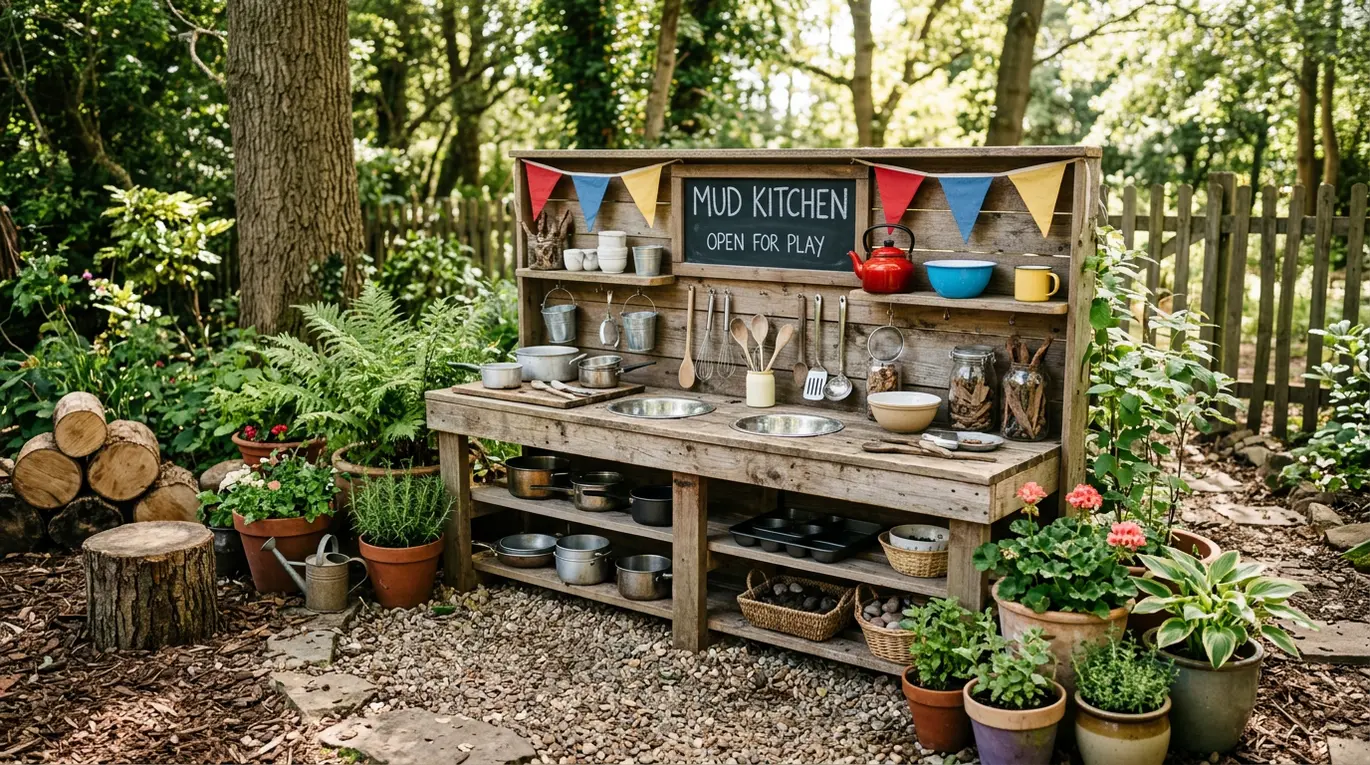
The Upcycled Pallet DIY Mud Kitchen Base
Start your DIY mud kitchen project efficiently by utilizing discarded wooden pallets, which offer a cost-effective and sturdy base. Carefully dismantle three to four pallets, ensuring all nails are removed, then sand the wood thoroughly to prevent splinters. Construct a simple rectangular frame for the countertop and a lower shelf using the longest pallet planks, securing them with exterior-grade screws and wood glue. For legs, cut four equally sized, robust pieces, attaching them firmly to the corners of your frame, creating a stable foundation for years of imaginative outdoor play.
Functional Repurposed Sink Installation
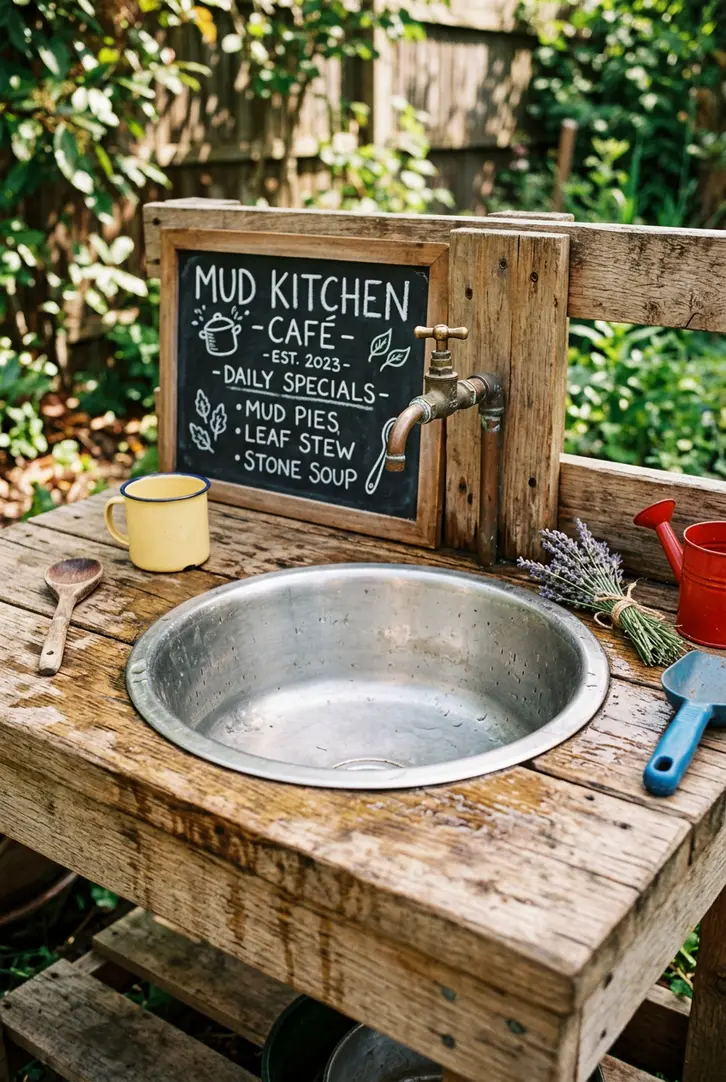
Enhance your mud kitchen’s realism by incorporating a repurposed sink, fostering water play and clean-up skills. Source an old stainless steel or plastic basin, even a large mixing bowl will work perfectly. Measure its dimensions and carefully cut a corresponding opening into your mud kitchen countertop using a jigsaw. Ensure the opening is slightly smaller than the basin’s lip for a secure fit, then drop the basin into place. You can optionally seal the edges with outdoor caulk for added stability and to prevent water from pooling underneath, creating an interactive wet play zone.
Creative Log Slice Stove Burners
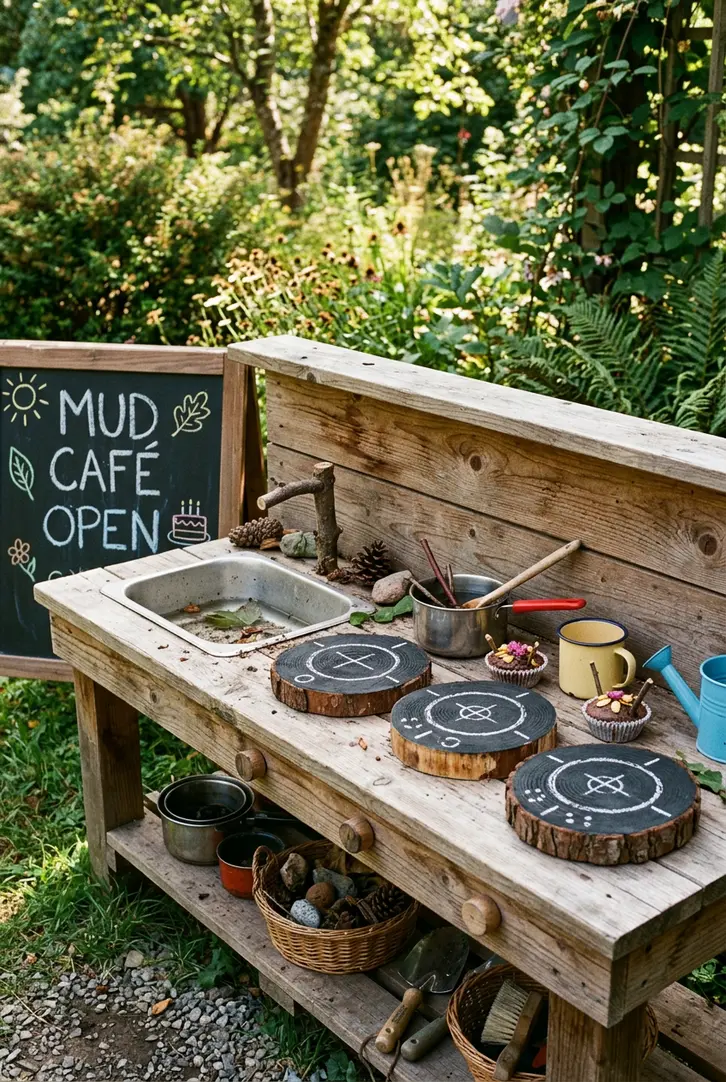
Bring an authentic cooking experience to your mud kitchen with charming log slice stove burners, adding a natural, tactile element. Collect several flat, round wood slices, roughly 4-6 inches in diameter, and sand them smooth. Paint the top surface of each slice black to resemble stove elements, then use white or silver paint to add circular ‘burner’ lines or ‘on/off’ knobs. Securely attach these painted log slices to the mud kitchen countertop using strong outdoor adhesive or countersunk screws, positioning them like a realistic stovetop for imaginative culinary adventures.
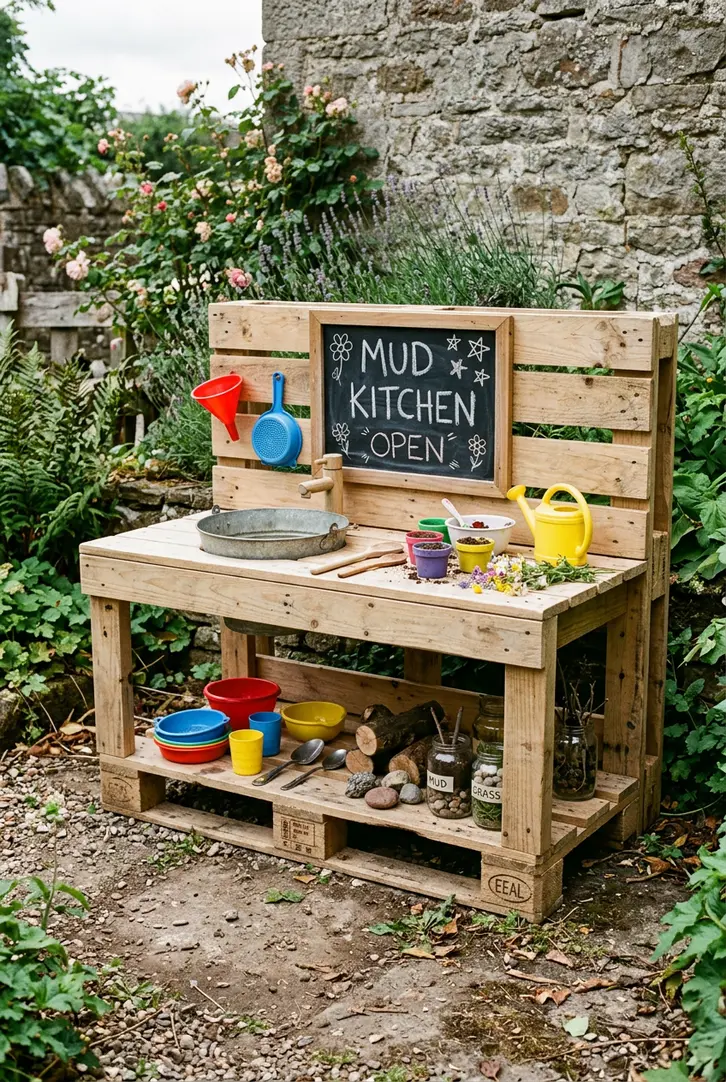
DIY Chalkboard Backsplash for Recipes
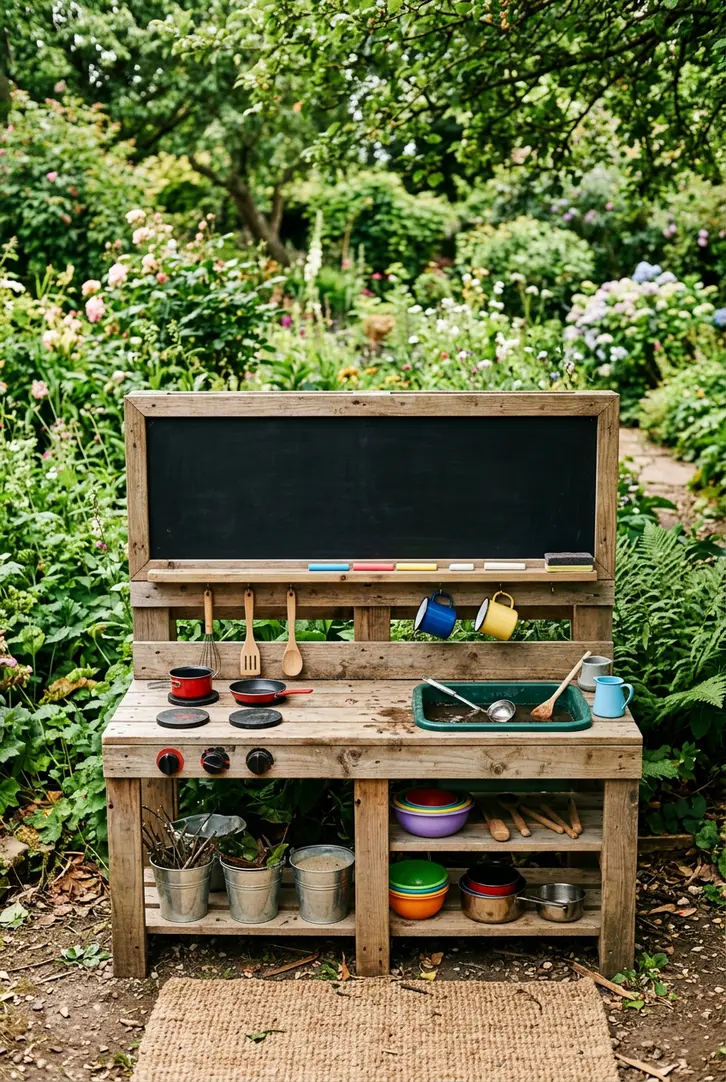
Stimulate creativity and literacy by adding a DIY chalkboard backsplash to your mud kitchen. Cut a piece of exterior-grade plywood or hardboard to fit the back section above your countertop. Prime the wood, then apply two to three coats of chalkboard paint, allowing ample drying time between each. Once cured, secure the board to the back of your mud kitchen frame using screws. This versatile surface allows children to write ‘menus,’ draw ‘food,’ or list ‘ingredients,’ instantly enhancing their imaginative role-play and early writing skills in their outdoor kitchen.
Building Practical Tiered Storage Shelving
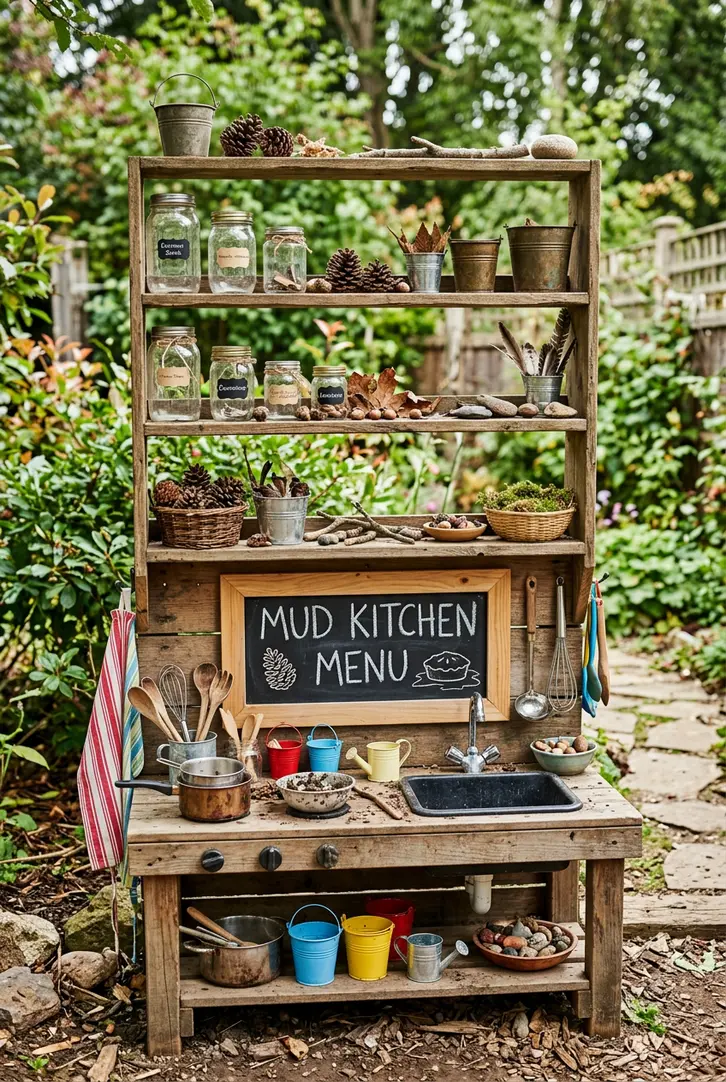
Optimize organization and accessibility in your mud kitchen with practical tiered storage shelving. Measure the available space below or beside your main counter. Construct simple shelves from leftover pallet wood or treated timber, ensuring they are shallow enough for little arms to reach. Securely attach these shelves to the mud kitchen’s framework using brackets and screws, spacing them appropriately for different-sized ‘ingredients’ like pebbles, leaves, or empty pots. This provides dedicated spots for natural treasures and play utensils, encouraging tidiness and structured play.
Designing a Rustic Mud Oven Area
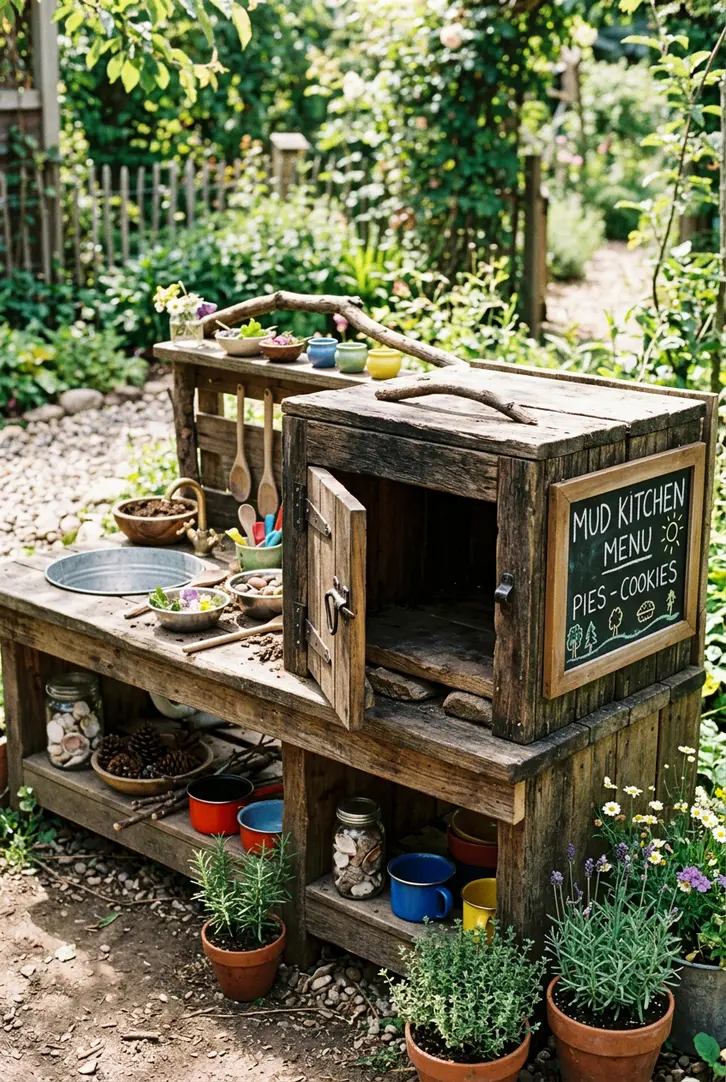
Complete the culinary experience in your mud kitchen by designing a rustic mud oven area, perfect for ‘baking’ those mud pies. Construct a simple, small wooden box structure from reclaimed timber or pallet wood, leaving the front open. You can add a small hinged door with a wooden knob for extra realism. Integrate this ‘oven’ either below the main counter or as an adjacent separate unit, securing it firmly. This dedicated space encourages children to engage in more complex imaginative cooking scenarios, enhancing their pretend play with a charming, functional feature.
Adding Mobility with Caster Wheels
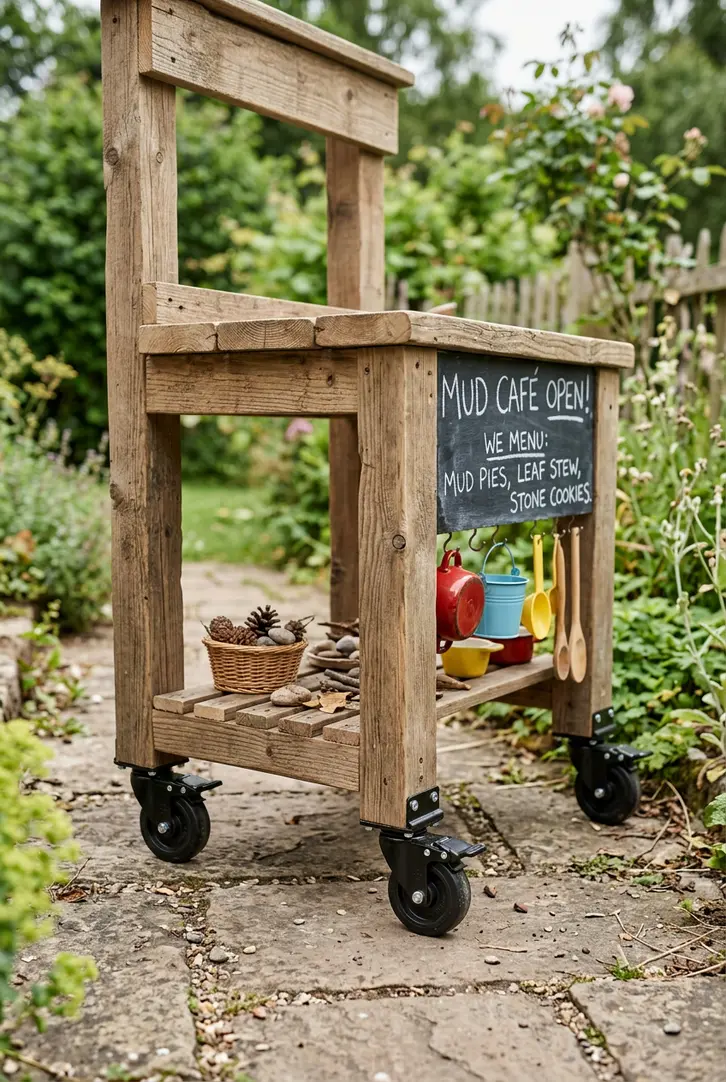
Grant your mud kitchen versatility by adding heavy-duty caster wheels, allowing it to be easily moved for shade, storage, or new play zones. Purchase four lockable, outdoor-grade swivel casters with a suitable weight capacity for your mud kitchen’s size. Attach one wheel securely to the bottom of each leg using appropriate screws. Ensure all wheels are properly aligned for smooth movement. The lockable feature is crucial for safety, ensuring the mud kitchen remains stationary during active play, providing flexible setup options for your outdoor play space.
Quick Build Using an Old Cabinet Frame
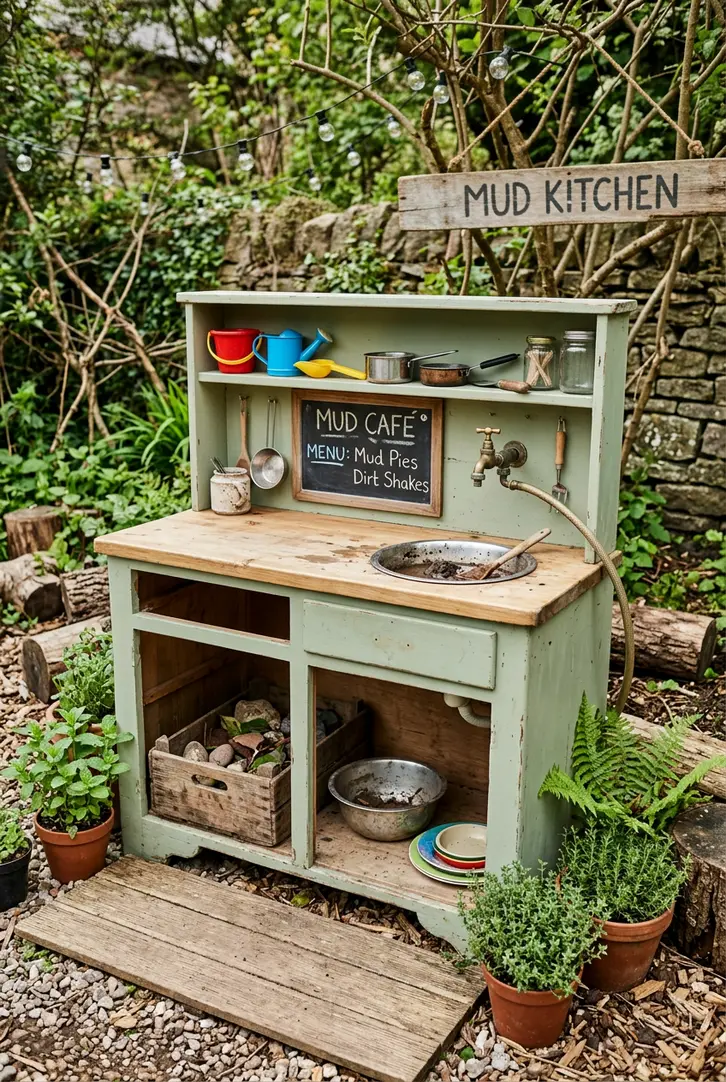
Accelerate your mud kitchen build by repurposing an old kitchen base cabinet, offering a sturdy and ready-made structure. Remove doors and drawers from the cabinet, filling any excess holes with wood filler. Lightly sand the entire unit, then apply a coat of outdoor-grade paint or sealant to protect it from the elements. This instant framework provides a countertop space and often includes internal shelving for storage. Adding a simple back panel from plywood can further stabilize it and offer a surface for accessories, making a quick and robust diy mud kitchen.
Crafting Natural Branch Utensil Hooks
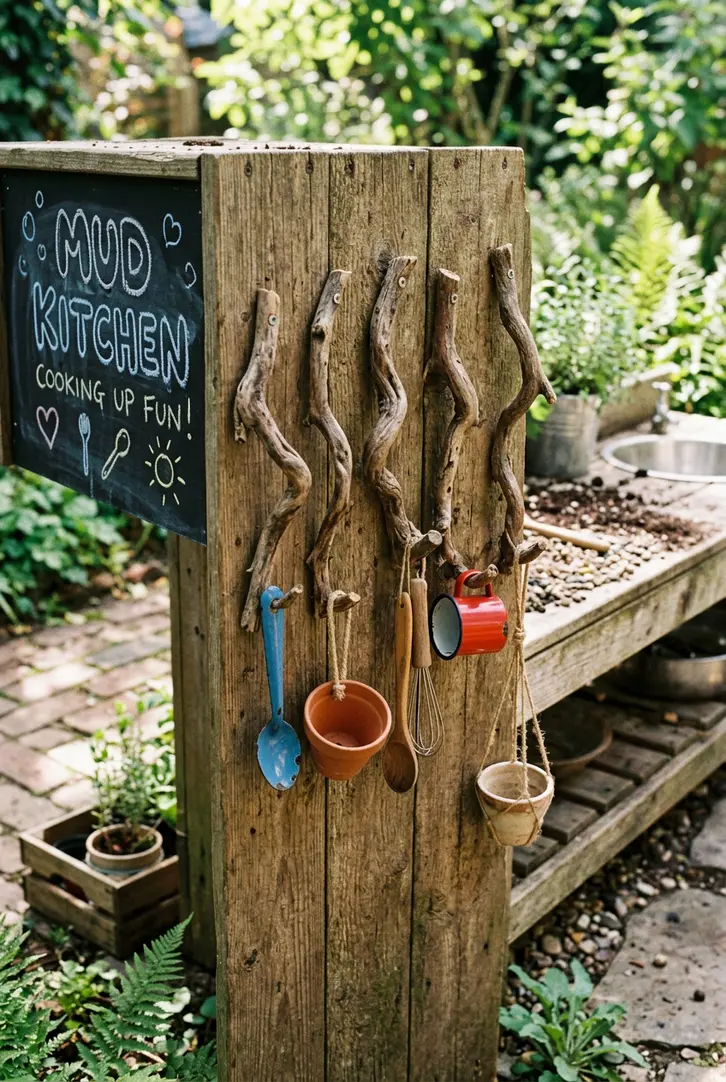
Embrace nature’s charm by crafting natural branch utensil hooks for your mud kitchen, providing rustic storage for play tools. Collect sturdy, interesting branches with natural ‘hooks’ or knots, ensuring they are free of pests and thoroughly dried. Trim them to size and sand any rough edges smooth. Pre-drill small pilot holes into the mud kitchen’s side panels or backsplash where you want the hooks. Securely attach each branch using exterior-grade screws, ensuring they are firm enough to hold small pots, sieves, or spoons, adding an organic aesthetic and practical storage.
Infusing Vibrant Color with Paint
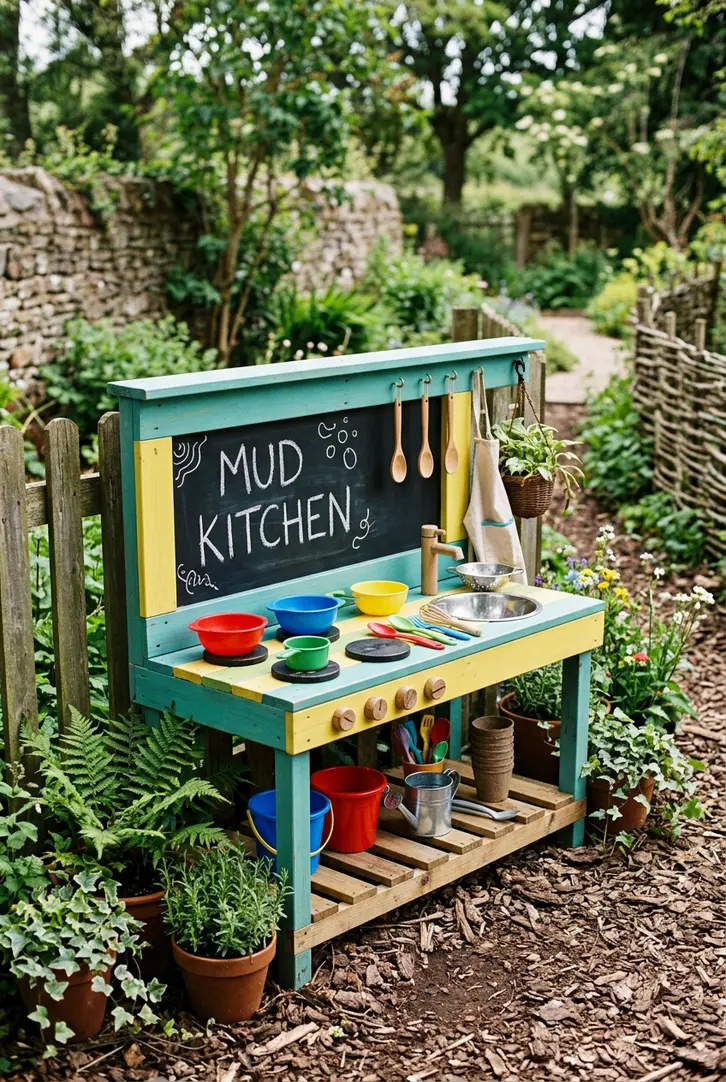
Personalize and brighten your mud kitchen by infusing it with vibrant colors using outdoor-grade paint. After constructing your mud kitchen from raw wood, thoroughly sand all surfaces and wipe clean. Apply a primer suitable for outdoor use, then unleash your creativity with a cheerful color palette – think sky blue, sunny yellow, or a playful teal. Consider painting different sections contrasting colors or adding decorative patterns. A fresh coat of paint not only makes your mud kitchen visually appealing but also adds an extra layer of protection against weathering, extending its lifespan.
Integrating a Child-Friendly Water Pump
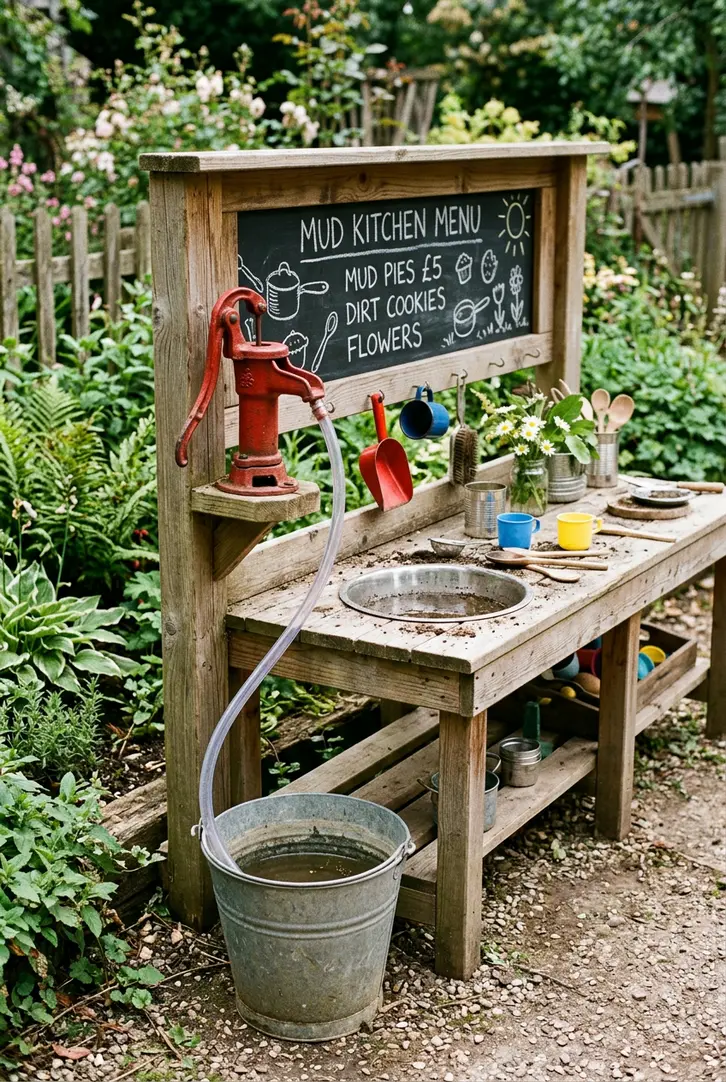
Elevate the interactive element of your mud kitchen by integrating a child-friendly water pump, offering hands-on sensory engagement. Purchase a small, manual hand pump designed for children, often found in garden or outdoor play sections. Securely mount the pump to the side or back panel of your mud kitchen, ensuring it’s at an accessible height for little ones. Connect the pump’s intake hose to a water source like a bucket or rain barrel, allowing children to actively pump water into their sink or mixing bowls. This adds a fantastic element for sensory exploration, crucial for early childhood development. Learn more about the benefits of sensory play here.
Planting a Miniature Herb Garden
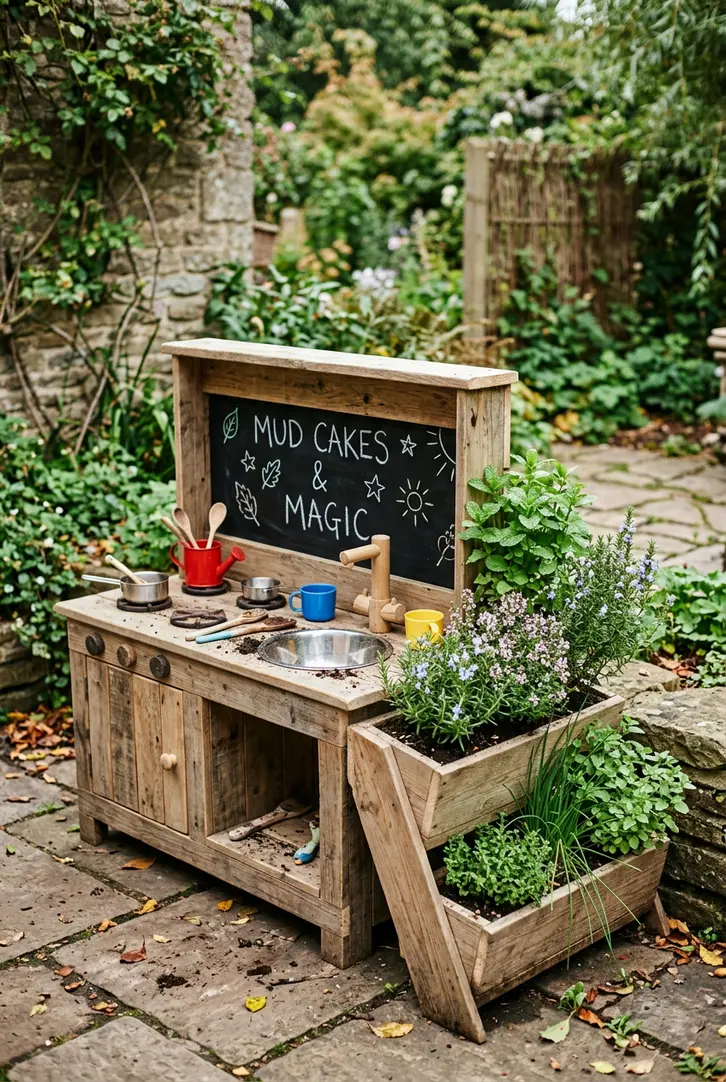
Blend nature and play by planting a miniature herb garden directly into your mud kitchen design. Attach small planter boxes made from treated wood to the sides or back of your mud kitchen. Fill these boxes with potting soil and plant child-safe, robust herbs like mint, thyme, rosemary, or chives. This addition provides children with fragrant, textural ‘ingredients’ for their mud recipes, encouraging them to engage with botany and understand where food comes from. It’s a wonderful way to introduce natural elements and stimulate multiple senses during play in their outdoor kitchen.
Defining the Play Zone with Stone Borders
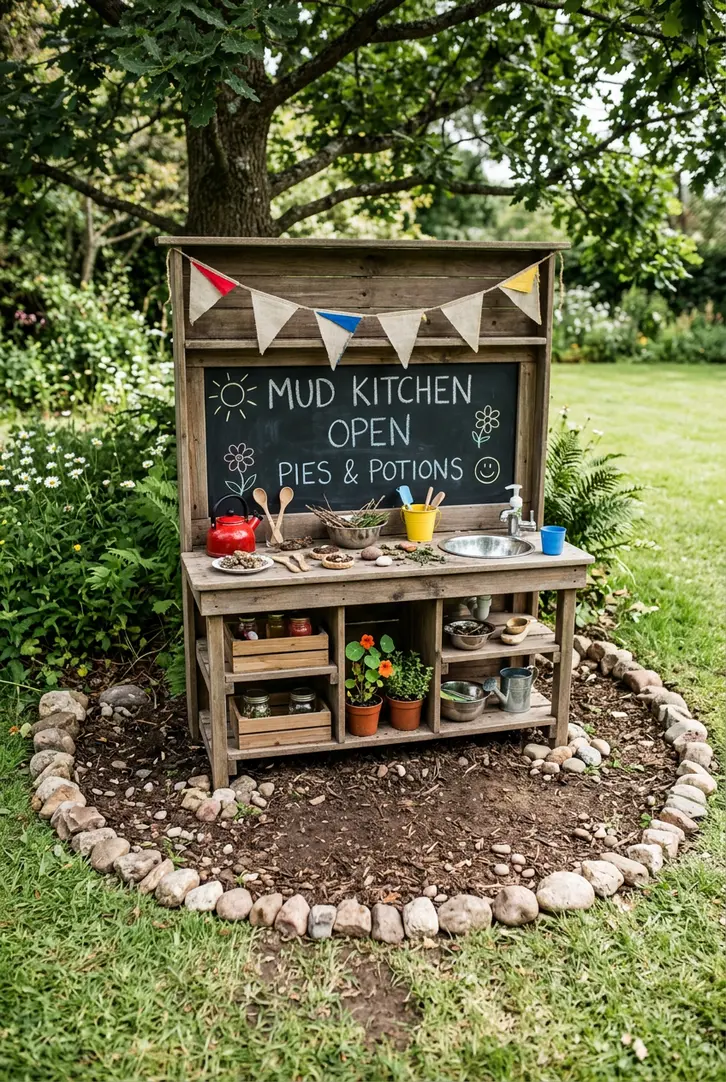
Clearly define your mud kitchen’s play zone and add a charming aesthetic by installing stone borders. Lay out a perimeter around your mud kitchen area using natural river stones, pebbles, or small landscaping rocks. Dig a shallow trench to seat the stones firmly, ensuring they create a low, safe barrier. This delineation helps contain the mud and play materials, preventing them from spreading across your entire yard. It also adds a visually appealing, organized look to the outdoor space while making cleanup easier for your diy mud kitchen activities.
Creating a Potion Station with Bottles
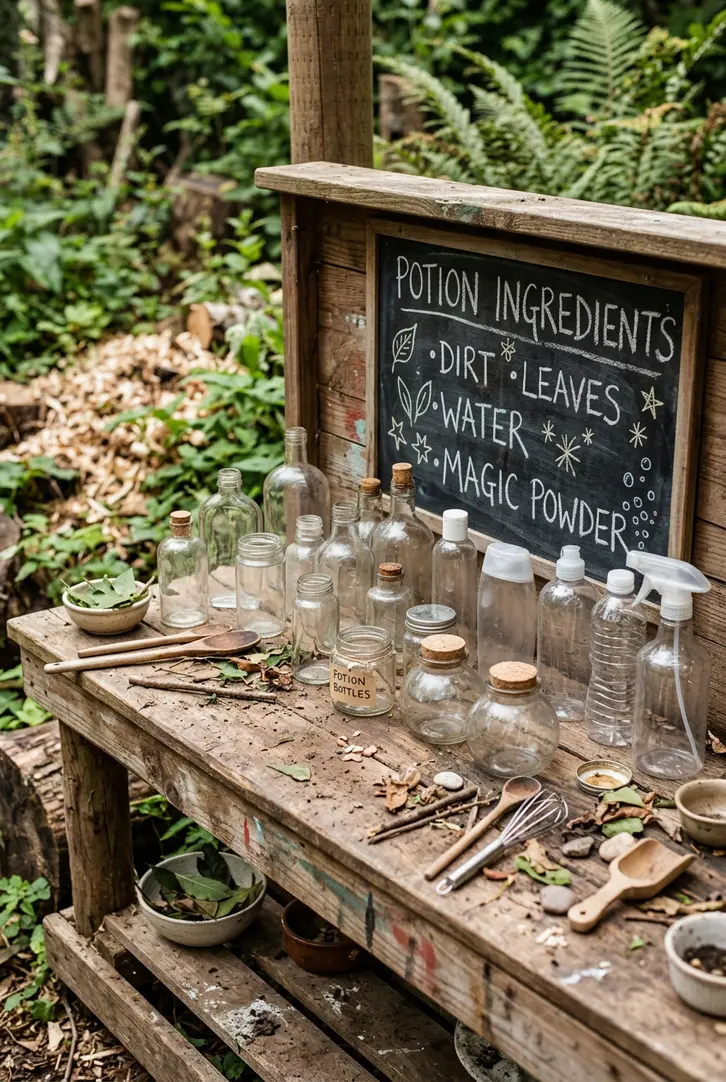
Spark mystical play by creating a potion station within your mud kitchen, utilizing an assortment of empty bottles. Collect various sizes and shapes of clean, clear plastic or glass bottles and jars. Arrange these on a dedicated shelf or section of your mud kitchen countertop. Children can fill these bottles with water, mud, leaves, flowers, and pebbles to concoct ‘potions’ and ‘experiments.’ This setup encourages scientific exploration, measurement concepts, and imaginative storytelling, turning a simple diy mud kitchen into a magical laboratory for young alchemists.
Compact Corner Design for Small Spaces
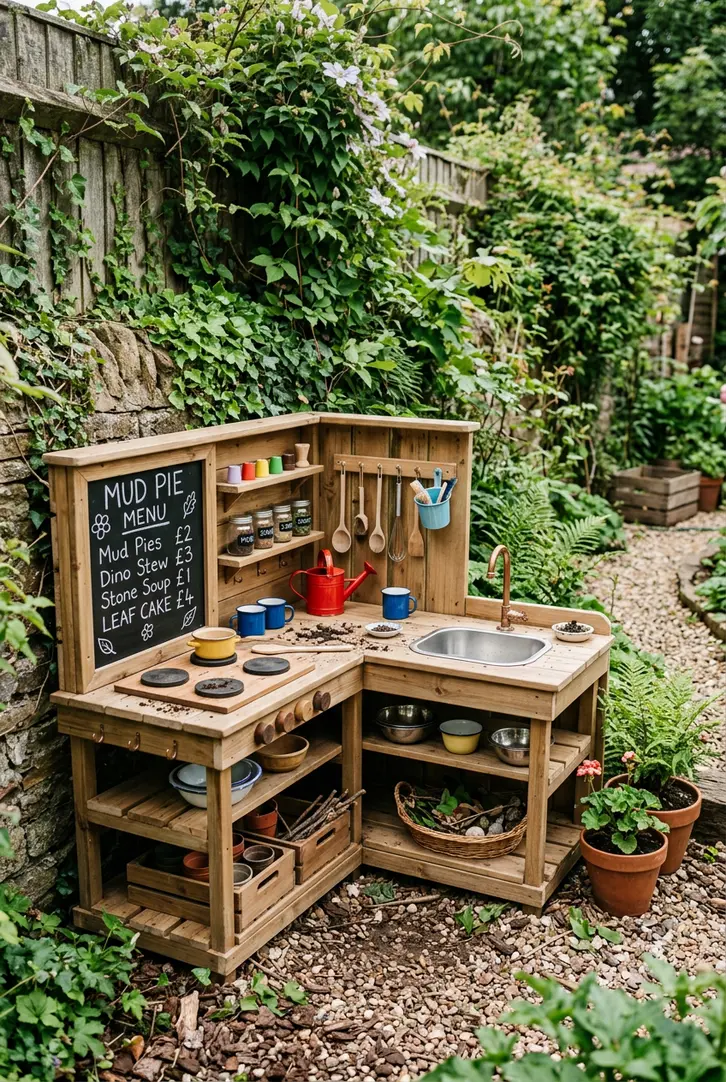
Maximize functionality in a compact yard by designing your mud kitchen with a corner layout. Utilize two pieces of exterior-grade plywood or pallet wood for the main L-shaped countertop, securing them to a sturdy frame. This design efficiently uses available space while still offering ample surface for play. Build integrated shelving or a small cabinet underneath one side to optimize storage without encroaching on the play area. A corner mud kitchen still provides all the imaginative benefits, proving that even small spaces can accommodate grand adventures.
Building a Robust Tire Stack Station

Construct a virtually indestructible mud kitchen base by repurposing old tires, offering a robust and budget-friendly option. Clean three to four old car or tractor tires thoroughly. Stack them vertically, securing each tire to the one below with heavy-duty screws, ensuring stability. Place a round or square piece of treated plywood on top of the uppermost tire to create a countertop. You can paint the tires in bright, cheerful colors for visual appeal and add smaller tires for seating or additional play surfaces. This tire stack diy mud kitchen is incredibly durable and provides unique sensory textures.
Adding a Canopy for Shade and Shelter
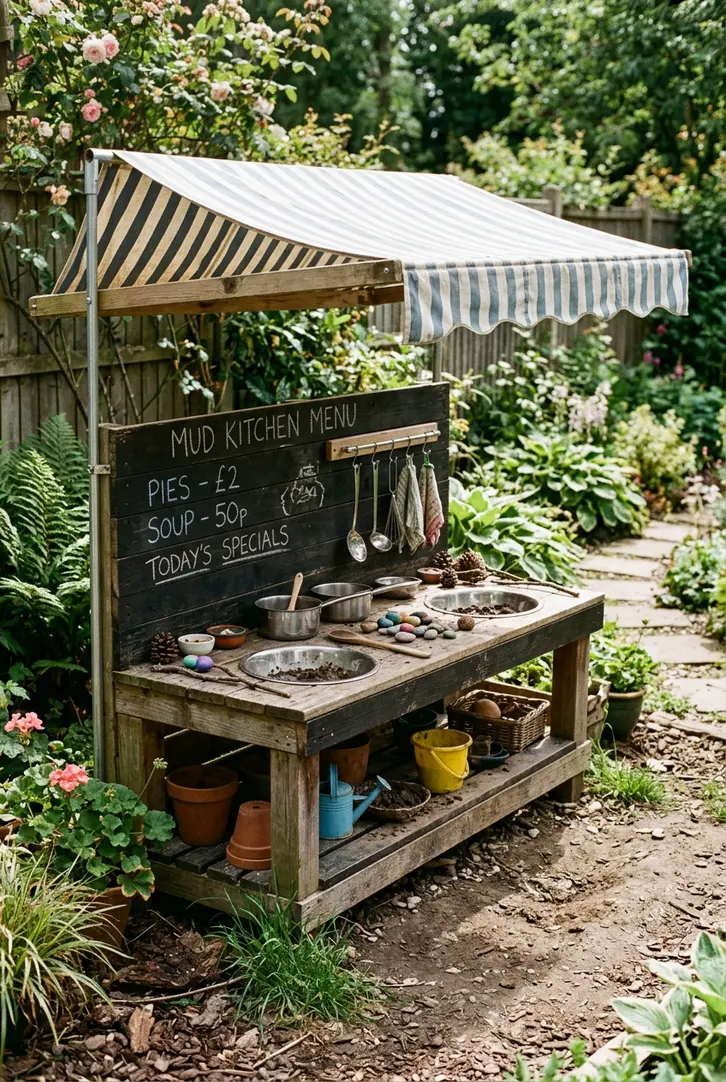
Extend playtime and protect your little chefs from the elements by adding a canopy for shade and shelter to your mud kitchen. Construct a simple frame from treated timber posts, securely attaching them to the back corners of your mud kitchen, extending upwards. Stretch a weather-resistant canvas or waterproof fabric over this frame, fastening it tightly to create a roof. This overhead cover provides essential sun protection on hot days and keeps light rain away, allowing for longer, more comfortable outdoor play sessions regardless of the weather, enhancing the overall appeal of your diy mud kitchen.
Inspiration Gallery Recap
Swipe through all the ideas below to find your perfect match.